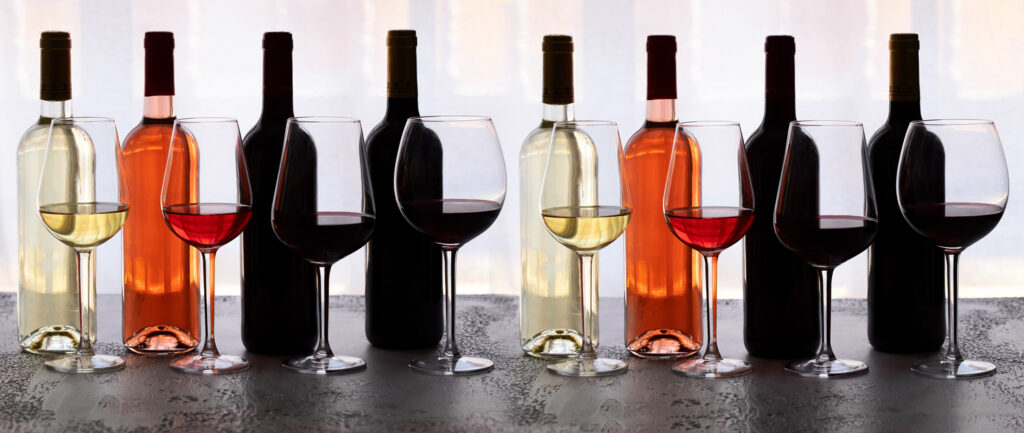
A common frustration for home winemakers using grape juice kits is wine clarity. Fermentation finishes, the wine tastes promising, but it just won’t clear. This often leads to rushed bottling, repeated fining additions, or the assumption that something has gone seriously wrong.
The good news is this: cloudy wine is almost never ruined wine. In most cases, haze simply means the wine needs more time, better gas management, gentler handling, or a clearer understanding of what is happening at each stage.
This guide focuses specifically on wine made from grape juice kits, not on wine made from fresh grapes. Kits ferment quickly, often produce large yeast populations, and are designed to clear after fermentation rather than during it. Understanding how they behave is key to producing wine that is not only clear, but stable and enjoyable months later.
We’ll walk through wine clarity in proper process order — from fermentation to bottling — and correct some common misunderstandings along the way.
Understanding Wine Haze in Kit Wines
Before fixing haze, it helps to understand what you are actually looking at. “Cloudy” wine is not one single problem — it can come from several different sources, and each behaves slightly differently.
Common Types of Haze
- Yeast haze: Live or dormant yeast is still suspended after fermentation. This is the most common cause in kit wines.
- Protein haze: More common in white wines. Proteins remain soluble at warmer temperatures but can become visible when chilled (sometimes called “chill haze”).
- Pectin haze: More common in fruit wines than in straight grape kits. It can occur if fruit or adjuncts are added. Grape-based kits are generally lower risk, but in some cases it is still possible.
- Gas haze (CO₂ haze): Dissolved carbon dioxide can physically prevent particles from settling. This is extremely common in kit wines that have not been fully degassed.
Wine kits are designed for reliability and speed. Fermentation is often vigorous, yeast counts are high, and clearing naturally happens after fermentation rather than alongside it. Trying to force clarity too early is one of the causes of long-term instability.
Clear wine is not about stripping particles out aggressively — it’s about creating the right conditions so gravity and chemistry can do their work naturally.
Make Sure Fermentation Is Truly Finished
Before considering wine clarity, confirm that fermentation is complete.
- Take stable gravity readings over consecutive days.
- Ensure there is no continued airlock activity.
- Confirm the wine is not producing new CO₂.
Fining or bottling before fermentation is complete will cause far bigger problems than haze.
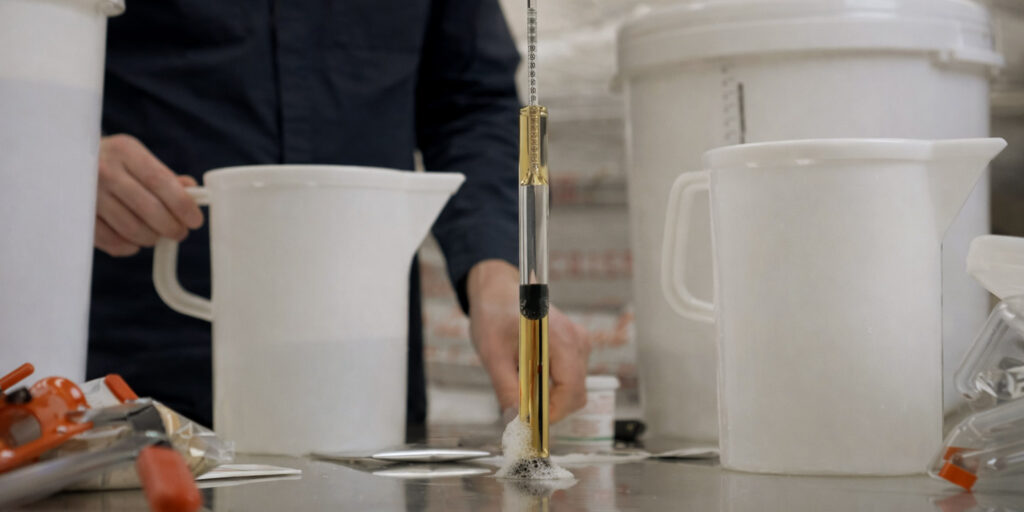
Degassing – A Hidden Key to Wine Clarity
Carbon dioxide is one of the most overlooked causes of haze in wine kits.
Even after fermentation appears finished, significant CO₂ can remain dissolved in the wine. This gas holds particles in suspension, reducing the effectiveness of fining agents.
Signs Degassing Is Needed
- Slight fizz or prickling sensation on the tongue
- Bubbles rise when stirred
- Finings appear ineffective
When to Degas
- After fermentation is complete
- Before adding finings
- Gently, to minimise oxygen pickup
Proper degassing dramatically improves natural settling and fining performance.
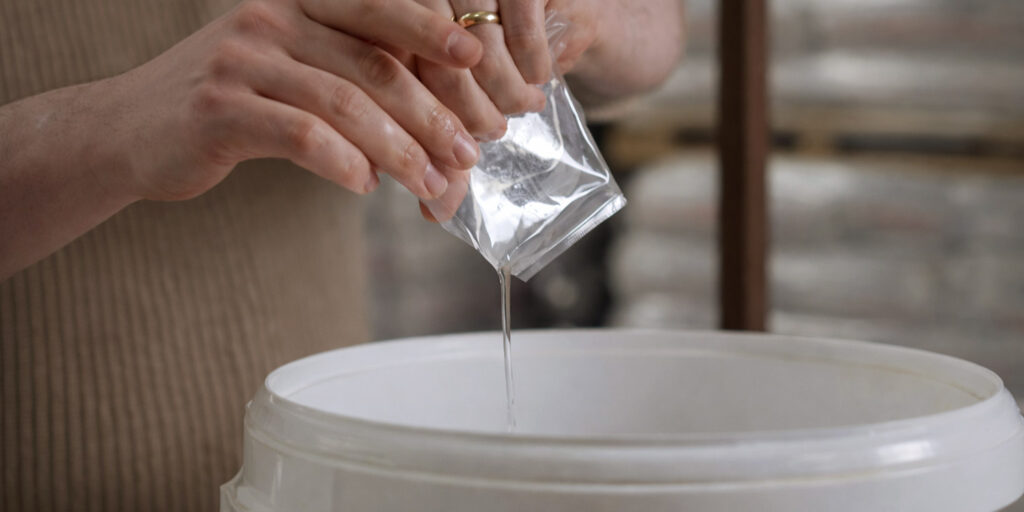
Use Finings Correctly For Wine Clarity
Finings are often misunderstood. Used correctly, they are highly effective. Used incorrectly, they can delay clearing or even create new haze.
What Finings Actually Do
Fining agents work through electrical charge attraction. Most haze-forming particles carry a charge. The fining agent carries the opposite charge, allowing particles to bind together into larger clumps that fall out of suspension.
Most modern wine kits use a two-stage fining system, typically:
- Kieselsol (negatively charged) — targets proteins and fine haze
- Chitosan or isinglass (positively charged) — binds yeast and remaining particles
The sequence matters. Reversing the order or combining stages reduces effectiveness.
Note:
Chitosan is derived from shellfish, and isinglass is derived from fish. If dietary or allergen considerations matter, check product details before use.
Best Practices for Finings
- Only fine after fermentation is fully complete
- Degas thoroughly before adding finings
- Add gently, without splashing
- Allow the full recommended time between stages
- Do not add “extra” finings unless clearly required
More finings do not mean clearer wine. Over-fining can leave excess fining agents suspended, creating a different haze that may take longer to resolve.
Oxygen — Friend Before Fermentation, Enemy After
Oxygen plays two very different roles in winemaking.
Before Fermentation
Before yeast begins active fermentation, oxygen is beneficial and often necessary:
- Yeast uses oxygen to build strong cell membranes
- Healthy yeast populations ferment more completely
- Strong fermentation reduces the risk of stalled yeast and lingering haze
At this stage, stirring and splashing are acceptable and sometimes recommended by kit instructions. We recommend airating for about two minutes by vigorously mixing.
After Fermentation
Once fermentation is complete, oxygen mainly presents a risk:
- Oxidation can dull aroma and flavour
- White wines may brown
- Long-term stability can be reduced
From this stage onward:
- Avoid splashing
- Keep siphon outlets submerged during transfers
- Minimise headspace where possible
Careful oxygen control protects wine quality while it clears.
Time Is a Real Ingredient for Wine Clarity
Many kits are marketed as drinkable in 7–14 days. This can be technically true. However, drinkable does not mean fully settled or fully stable.
Given time:
- Yeast naturally flocculates and drop out
- Protein complexes settle
- Harsh tannins soften
- Flavours integrate
Haze that seems stubborn at week two often disappears entirely by week four or six without intervention.
As a general guide:
- White wines often clear faster than high-tannin reds
- Faster fermentation does not equal faster clearing
Time is not inactivity. It is part of the process.
Cooler Temperatures Encourage Settling
Temperature affects how quickly particles fall out of suspension.
Cooler, stable conditions:
- Reduce molecular movement
- Encourage yeast and proteins to clump
- Improve fining effectiveness
Many winemakers notice significant improvement when the wine is moved to a consistently cool area after fermentation. A moderate, stable cool environment is more effective than dramatic temperature swings.
Important distinction:
Very cold temperatures are sometimes used for “cold stabilisation” in grape wines to reduce the formation of tartrate crystals later. This is a separate process from normal haze clearing and is not required for every kit wine.
When Cooling Helps Most
- After fermentation is complete
- After the finings have been added
- During the final clearing before bottling
Extreme cold is unnecessary and can stress the wine. A consistently cool environment is far more effective than sudden temperature swings.
Clear Does Not Mean Finished
A common mistake in kit winemaking is bottling as soon as the wine looks clear.
Clarity is a visual checkpoint, not the finish line. Even when wine appears bright:
- Microscopic particles may still be settling
- Dissolved CO₂ may remain
- Chemical stabilisation may still be progressing
Bottling too early can result in sediment forming in bottles weeks later, even if the wine looked perfect at bottling.
Allow the wine to clear before bottling to improve stability and appearance.
Rack Gently and With Purpose
Racking helps separate clear wine from sediment, but poor technique can undo progress.
Best Racking Practice
- Siphon slowly and smoothly
- Keep the siphon tip above the sediment
- Avoid splashing
- Do not chase the last litre
Leaving a small volume behind is better than pulling fine sediment into otherwise clear wine.
Haze vs Sediment — Know the Difference
It helps to distinguish between two common issues:
Uniform haze
The entire wine looks cloudy. This usually relates to yeast, protein, pectin, or dissolved CO₂.
Bottle sediment
The wine looked clear when bottled, but it later developed sediment. This is often caused by:
- Bottling too early
- Fine lees being pulled through during racking
- Natural tartrate crystals forming in cold storage
Not all sediment indicates a fault. Understanding the difference prevents unnecessary intervention.
Why My Wine Won’t Clear — Troubleshooting Table
Below is a practical troubleshooting guide for the most common reasons kit wines refuse to clear. Work through it calmly and in order — most issues resolve without drastic intervention.
| Problem You See | Likely Cause | Why It Happens | What To Do |
| Wine still cloudy after fermentation | Yeast still in suspension | Fast kit fermentations leave large yeast populations | Give it time; keep wine cool and undisturbed |
| Finings didn’t work | Wine not fully degassed | CO₂ keeps particles floating | Degas thoroughly, then re‑fine if needed |
| Cloudy again after clearing | Bottled too early | Micro‑particles still settling | Let clear wine rest longer before bottling |
| Persistent haze in white wine | Protein haze | Proteins remain soluble at warm temps | Chill wine and allow time; follow fining order |
| Haze appears when chilled | Chill haze | Protein instability revealed by cold | Allow wine to stabilise longer before bottling |
| Sediment in bottles | Racked too close to lees | Fine sediment pulled through | Improve racking technique; don’t chase volume |
| Wine never fully clears | Oxygen exposure after fermentation | Oxidation interferes with settling | Reduce splashing; minimise headspace |
| Wine tastes fizzy and cloudy | Dissolved CO₂ | Gas physically holds haze up | Degas gently before finings |
| Added extra finings, still hazy | Over‑fining | Excess fining agents remain suspended | Allow time; avoid adding more products |
| Wine cleared then re‑clouded | Temperature swings | Particles re‑suspended | Keep wine in a stable, cool environment |
Most clarity problems are process issues, not kit faults. Slow down, stabilise each step, and let gravity work in your favour.
Clear Wine Comes From Process, Not Panic
Modern grape juice wine kits can produce beautifully clear, stable wine when handled carefully.
The core principles are simple:
- Confirm fermentation is complete
- Degas thoroughly
- Follow the fining instructions exactly
- Manage oxygen after fermentation
- Keep wine cool and stable
- Allow time before bottling
- Rack gently and intentionally
Most clarity problems are process issues, not kit faults.
Slow down, stabilise each step, and let gravity work in your favour. With patience and good technique, your kit wine can be just as visually impressive as it is enjoyable to drink. Happy Brewing 🍷
Let’s Brew Together