Have you ever wondered how hops are grown and harvested? If so, this blog post on Hops Life Cycle is for you! Here, we’ll discuss the hops life cycle and how to grow them. From germination to harvest, we’ll explain each step of the hops life cycle and provide tips on growing hops successfully. Whether you are a commercial brewer who purchases your hops from Geterbrewed, a homebrewer looking how to add your own hops to beer, or just interested in learning more about the process, this blog post has you covered
The History and Importance of Hops in Brewing
The history and importance of hops in brewing is a fascinating journey that spans centuries. Hops have played a crucial role in the beer-making process, contributing not only to the flavour but also to the preservation and stability of the brew.
Centuries ago, brewers realized that hops added a unique bitterness and aroma to their beer. This discovery revolutionized the brewing industry, as hops became preferred over other bittering agents like herbs and spices. Hops were cultivated in monastic gardens in Europe during the medieval period. As the demand for hops grew, hop farms emerged, dedicated solely to producing this valuable ingredient. Today, hop farms can be found worldwide, providing brewers with many hop varieties.
Sourcing hops is an essential aspect for brewers. We appreciate the trust placed in our family business by brewers trusting us to buy their hops from the best hop farmers. The quality and characteristics of hops can significantly impact the final flavour and aroma of the beer. Geterbrewed carefully selects the hops that best suit their customers’ desired needs, focusing on premium quality, fast shipment and cold storage throughout the process.
Buy hops for homebrewing from Geterbrewed
Register for wholesale access to commercial brewing hops
Hop Anatomy and Varieties
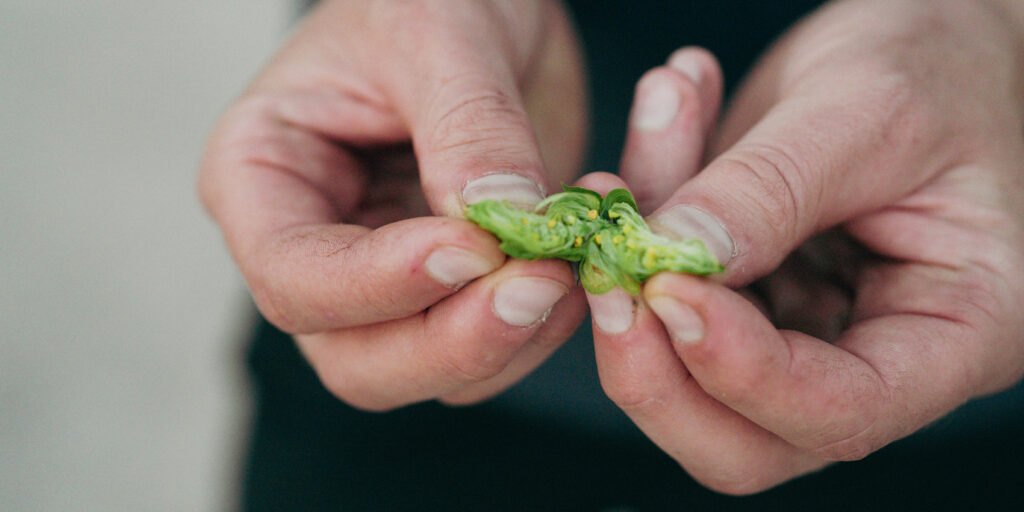
It’s essential to start with their anatomy and the various varieties available. Hops are the flowers of the hop plant, scientifically known as Humulus lupulus. These cone-shaped flowers contain various compounds that contribute to beer’s flavour, aroma, and bitterness. Check out the GEB Youtube channel for some awesome informative videos on the hop industry, especially the short on the anatomy of a hop.
Hop varieties can vary significantly in terms of their characteristics and uses. Some popular varieties include Cascade, Centennial, and Styrian Goldings. Each variety has a unique flavour and aroma profile, allowing brewers to experiment and create different beer styles.
Hop farms play a crucial role in the availability of these varieties. They cultivate and harvest hops to ensure a consistent supply for brewers. It’s clear why so many brewers choose to source their hops Geterbrewed as they have invested heavily in facilities and relationships to ensure premium quality hops. The quality and characteristics of the hops significantly impact the final product after all, and we are confident we sell the best hops.
Sourcing hops involves carefully selecting the varieties that best complement the desired beer style and taste profile. Brewers consider factors such as alpha acid content (which contributes to bitterness), oil content (which contributes to aroma), and the overall quality of the hops. Geterbrewed provides a full certificate of analysis that highlights the quality parameters and monitors the hops life cycle with their growing and processing partners.
Germination and Planting
Germination and planting are crucial steps in the hops life cycle. This is where the magic begins, as tiny hop seeds emerge and grow into the magnificent hop plants we know and love. So, how does it all happen?
Buying hop rhizomes from a reputable supplier or hop institute is vital to start the germination process. The plants’ quality can significantly impact your hop-growing journey’s success. Once you have your seeds, it’s time to prepare them for planting.
The best Commercial Hop farms tend to work closely with a hop institute that helps grow hundreds of thousands of miniature plants to take to the fields. The increased level of control provides a scientific approach to disease and pest management, ensuring only quality plants reach the field.
If you are a home brewer, you can purchase rhizomes or seeds, in the latter’s case. First, soak the seeds in water for 24 to 48 hours. This will help soften the outer shell and promote germination. After soaking, transfer the seeds to a damp paper towel and place them in a plastic bag. Keep the bag in a warm, dark place like a closet or a heated greenhouse.
After about a week, you should see small white sprouts emerging from the seeds. Once the sprouts reach a length of about 1 inch, it’s time to plant them in soil. Choose a sunny location with well-drained soil for planting your hops. Create mounds or rows in the soil and plant the sprouted seeds, covering them lightly with soil. Water the seeds thoroughly and keep the soil consistently moist throughout the germination.
Growth and Maintenance
It’s time to dive into your hop plants’ growth and maintenance phase. This part of the hops life cycle is where you’ll see your plants take off and climb towards the sky.
Commercial Hop fields have large Trellis systems anchored with a robust cable capable of carrying the weight of the plants and the irrigation systems. The trellis systems can be an impressive 7.5 metres high. Hops are perennial plants, so after harvest, there is approximately 1 metre of bine left in the ground, and the plant lifecycle will usually be 20 years before it is replaced. The hop field will also require a rest after this period to allow the soil and opportunity to replenish. Hops require cold winters and warm summers with plenty of sunshine to achieve a good crop. It is also important, with the extreme heat we are seeing now, to have adequate water or irrigation systems.
After harvest, the leaf and stem are removed during processing and returned to the fields as fertiliser. Extra fertiliser like cow manure is also spread on the fields and ploughed. This ploughing is helpful for when the frost comes and helps break up the soil well.
Spring prep
Spring field preparation sees the bines strung from the trellis to give the hop plants something to grow up. The early shots require hand training, and it takes considerable labour effort to manually train each plant onto the bines. 3 -4 bines are selected and hand-trained. Hop plants can grow quickly during May-June, achieving up to 25 cm daily. The hop plants grow up the bine first, then outwards, and the hop flower develops as birrs. The birrs subsequently become the hop cone/Flower. The moisture content and soil analysis monitoring continue to see if the hops require nutrition with fertiliser or need spraying to prevent disease. The Hop Institute analyses what is required and when to ensure a scientific agricultural approach.
Many hop farmers are multi-generational, so they have generations of knowledge and know-how on the correct harvest time. The harvest window is commonly referred to as the time period that suits each variety. It varies from one hop variety to another, and the time period is usually around 25 days on average to complete the harvest.
Home Tips
If growing at home, it’s important that you provide them with the support they need as hop plants continue growing. Install a sturdy trellis system or set up hop poles for the plants to climb on. Hops are vigorous climbers who can reach impressive heights, so ensure your support system is solid and stable.
Watering is also a crucial aspect of maintaining healthy hop plants. Hops require consistent moisture, especially during hot and dry periods. Water the plants deeply, ensuring that the soil is thoroughly soaked. Avoid overwatering, as this can lead to root rot and other issues.
Watch for any pests or diseases that may affect your hop plants throughout the growing season. Aphids, spider mites, and powdery mildew are common issues farmers face. Regularly inspect your plants and take appropriate measures to control and prevent these problems.
Lastly, consider fertilizing your hop plants to promote healthy growth and maximize yield. Choose a balanced fertilizer formulated explicitly for hops and apply it according to the package instructions. This will provide the necessary nutrients for your plants to thrive.
Harvesting and Processing
After months of careful nurturing and tending, the time has finally come to harvest your precious hop flowers/cones. This part of the hops life cycle is an exciting moment for hop farmers and brewers, as it signifies the culmination of their hard work and the potential for creating exceptional beers. So, how do you go about harvesting and processing hops?
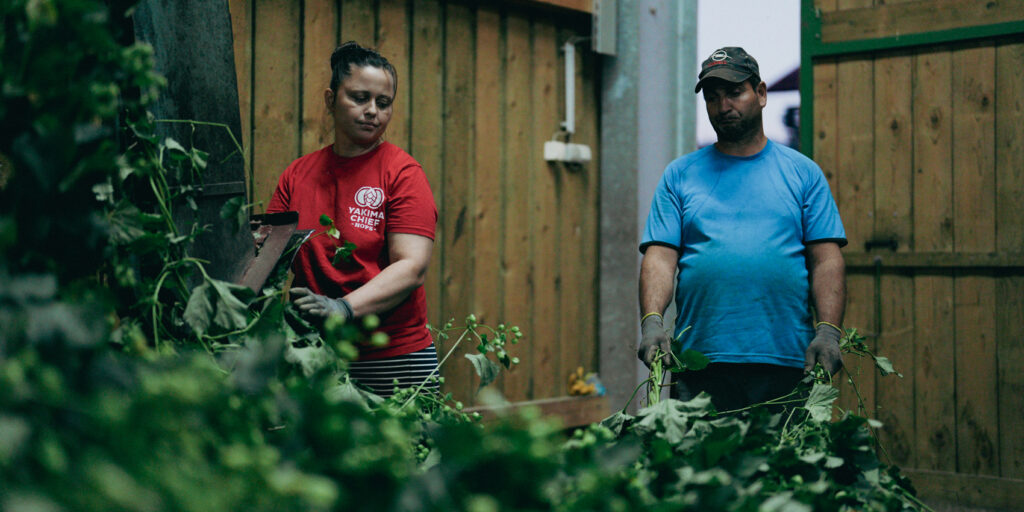
Historically, hops used to be manually picked, and they were measured in special bushels/pails. The first bushels were woven, then wooden and later made of aluminium. All of them measured 30 litres. In measuring, the flowers/cones needed to be accurately picked without leaves. Before the use of wires on the trellis, hops climbed tall wooden poles called “stange” , after picking, they pulled out the poles and stacked them into stacks/pyramids. Thankfully, things have been somewhat automated with modern tractors and trailers bringing the hop bines to the processing plant where the hop flowers/cones are stripped from the nine, and conveyors subsequently separate the leaf from the hop cone and place it in a collection chamber.
Timing
When it comes to harvesting hops, timing is key. The optimal time to harvest your hop cones is when they are fully matured but before they deteriorate. This is typically determined by the touch and smell test – the cones should feel papery and spring back when pressed and emit a strong, pleasant aroma. Commercial hop farms will have detailed moisture and oil content analyses to allow them to know when to begin the harvest.
The European harvest method is to cut the bine from the bottom, and as the tractor drives forward, the bine falls into the collection trailer towed behind the tractor. A farm is worked in the rear of the trailer, ensuring the hops are within the walls of the trailer.
Processing
The hops are taken a short drive to the processing facility, of which all hop farms need their own processing and kiln facility. The hops are processed into a collection chamber before being dried. The drying process reduces the moisture content to a stable level before processing further into foil-packaged leaf hops or T90 pellets. Hops move from the collection chamber to the top of the processing facility. The kiln boxes hold a specific amount of hops at a certain depth, allowing hot air to flow through them, drying them out and reducing the moisture content. These kilns have multiple layers and false bottom floors that allow the hops to be dropped into the chamber below. The aim is to take the moisture content from approx 75-80% down to 7%. Then, a little moisture is added back (air-based) in to bring it to 10%.
The dried hop cones are compressed into bales, usually around 60kg in weight and stitched. The bales are then transported to the processing facility. The level of checks carried out at the processing facility ensures that premium quality is maintained to provide Geterbrewed with the best hops. We have visited some of our processing facilities with our talented content creators, and you can see these videos on the Geterbrewed YouTube channel.
We strongly believe that t90 hop pellets are the finest to use, given true to style and consistently impressive results. The processing of the t90 pellets with liquid nitrogen, keeping the pelletising dye cold throughout, means we get super-quality hop pellets.
Hops at home
If doing this at home, carefully cut the hop bines at the base to begin harvesting, not damaging the main plant. Gently lower the bines to the ground or onto a tarp to avoid damaging the hop cones.
Once the hop bines are cut, it’s time to separate the cones from the bines. This can be done manually by plucking the cones off the bines. The goal is to collect as many intact hop cones as possible while minimizing damage.
Next, it’s time to dry the hop cones. Drying removes excess moisture and helps to preserve the hops. Spread the cones in a thin layer on a screen or a clean, dry surface in a well-ventilated area. Turn the cones regularly to ensure even drying. The hop cones usually take 24 to 48 hours to dry completely, but this can vary depending on temperature and humidity. You can use a home dehydrator if you have one.
Once the hop cones are fully dried, they can be stored for future use. The best way to store hops is in airtight containers, such as vacuum-sealed bags or mason jars, in a cool fridge below 4 degrees. Proper storage will help to maintain the hops’ freshness and quality for an extended period.
When using the hops in your brewing process, simply measure the desired quantity and add them to your recipe. Hops can be used for bittering, flavouring, and aroma purposes, depending on the brewing or distilling technique.
Hop Storage and Usage
Now that you’ve successfully harvested and processed your hops, it’s time to talk about hop storage and usage. The hops life cycle it requires proper storage, which is crucial to maintain the freshness and quality of your hops for future use. Here are some tips to ensure you get the most out of your hops:
- Buy hops: Start by sourcing high-quality hops from reputable suppliers. This ensures you start with fresh and flavorful hops right from the beginning. Geterbrewed has built great relationships with hop farmers and merchants to bring you a catalogue of hops suitable for creating award-winning beer recipes.
- Storage: Store your hops in cold storage below 4 degrees, and if opening a foil pack, reseal them and place them back into cold storage. This helps to preserve them.
- Consider blending Crop Years: It doesn’t always have to be the latest hop crop, as some years can be better than others, and we suggest a tip to blend crop years to achieve true-to-style consistency.
- Labelling: Don’t forget to label your hop storage with the variety, harvest year, and any other relevant information. This makes it easier to identify and use the hops later on. All Geterbrewed hops travel with this info and have a certificate of analysis to give you all the analytical data you need
- Proper management: When it’s time to use your hops, you may be able to secure many of the hops on spot sales, but for key core beers in mass production, it is advisable to contract your hop supply in advance to ensure consistent supply.
Common Hop-Related Issues for Brewers
Brewers, we know that working with the hops life cycle can sometimes come with its fair share of challenges. As you navigate the world of hop cultivation and utilization, it’s essential to be aware of the common hop-related issues that can arise.
One common issue farmers face is pest infestation. Aphids and spider mites can wreak havoc on your hop plants, causing damage to the leaves and impacting the overall health of the plants. Regular inspection and implementing appropriate pest control measures, such as introducing beneficial insects or using organic insecticides, can help mitigate this issue.
Another challenge is the development of powdery mildew, a fungal disease that can affect hop plants. Powdery mildew appears as a white powdery coating on the leaves and can stunt the growth of the plants if left untreated. To prevent powdery mildew, ensure proper air circulation around the plants, remove any infected leaves or plant debris, and consider using fungicides if necessary.
Climate conditions can also pose challenges for brewers. Extreme temperatures, excessive rainfall, or drought can impact the growth and health of hop plants. It’s vital to choose hop varieties suitable for your specific climate and provide appropriate care, such as watering and shading, to help the plants thrive.
Tips for Maximizing Hop Yield
To maximize hop yield and get the most out of your hop plants, here are some tips to consider:
- Choose a suitable hop variety: Different hop varieties have different growth habits and yield potentials. Research and select a variety known for high yields and suitable for your climate and growing conditions.
- Provide adequate support: Strong and sturdy trellis systems or hop poles are essential for supporting the vigorous growth of hop plants. Ensure that your support structure is built to withstand the weight and height of mature hop bines.
- Prune and train your plants: Regularly prune excess lateral growth and train the bines to climb in a controlled manner. This promotes better air circulation, reduces the risk of diseases, and allows for easier harvesting. Have cover crops on the ground below the bines as this will help keep the soil temperature lower when the sunshine is intense.
- Monitor irrigation: Consistent and appropriate watering is crucial for hop plants. Ensure that the soil remains evenly moist but not waterlogged. A drip irrigation system or soaker hoses deliver water directly to the roots.
- Fertilize properly: Hop plants have specific nutrient requirements. Use a balanced fertilizer formulated explicitly for hops and follow the recommended application rates. Be cautious not to over-fertilize, negatively impacting hop quality and yield.
- Monitor pest and disease pressure: Regularly inspect your hop plants for signs of pests or diseases. Take preventive measures such as using organic pest control methods or integrated pest management strategies to minimize damage and yield losses.