Beginners guide to cider making – looking at how to make cider from apples. This is the time of year when everyone has access locally to an abundance of apples, and it’s a very rewarding process if you can make some delicious cider from the fruits of your labour.
Apples grow in various varieties in Britain & Ireland, and you can have sweet and bitter varieties. I enjoy a blend of sweet apples with tart apples to produce a medium-bodied cider. Check out our video discussion with a local cider producer explaining how cider apple varieties impact the final cider produced.
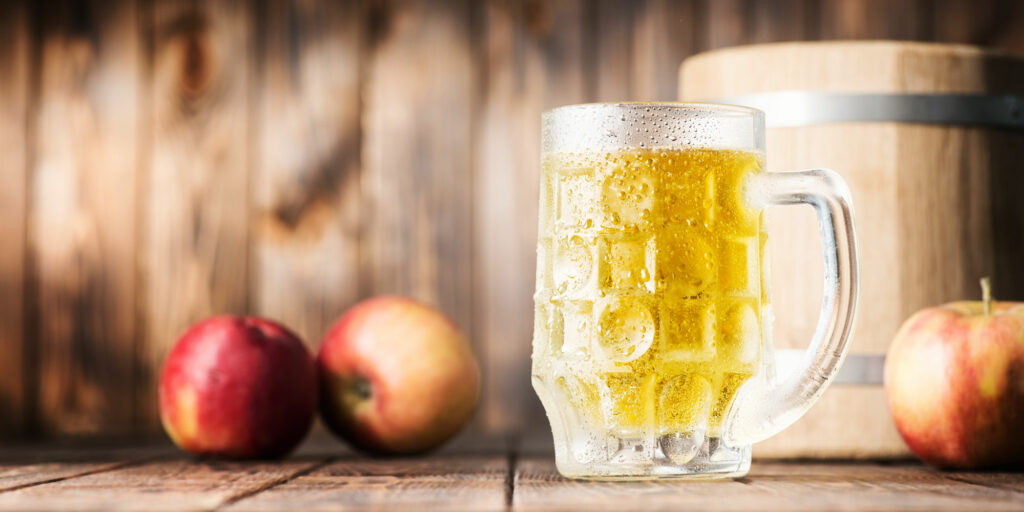
We summarise the following beginner’s guide to cider making in easy-to-follow steps to making your own cider from apples at home.
- Collecting / Harvesting the apples – whether this be from the apple tree in your garden or from a community orchard, or provided by someone who has a glut
- Checking for ripeness. The apple should come away quickly from the tree, and you will usually see indications of some windfall apples at the base of the tree. It’s good practice to give the apples a clean with some water. There will be naturally occurring yeast on the apple’s skin and possible contaminants.
- Clean your equipment. As with all fermentations, following good sanitisation processes is important to allow the fermentation the best possible chance of success. We stock a wide range of cleaning products to help you brew successfully & consistently.
- If making apple juice from scratch, you will need to cut and prepare the apples for the press. Clean the apples and then chop them ready for the fruit press. You can pulp the apples using a pulp master to ensure you get maximum juice extraction from the fruit press.
- Place the chopped or pulped apples into a straining bag and then place this into the fruit press. The aim is to fill the fruit press with approximately 3/4 of the total volume. The fruit press is used to extract the juice from the fruit. We supply spindle fruit presses.
- Turn the handle on the cider press until it’s adding top pressure to the apples in the straining bag. Once you see the apple juice start to flow out of the base of the press, you can stop turning the press. When the flow stops, you can turn the spindle again and repeat until you extract all the juice from the apples.
- Add a Campden tablet to the collection vessel for every 4.5 litres of juice. This helps prevent oxidation and also to subdue the wild yeasts & bacteria that are naturally on the apple skins. The addition of a Campden tablet stabilises the apple juice, preparing it for the addition of yeast.
- Checking the pH of the apple juice. We recommend you do this with one of our pH meters. We have a wide range available to suit all budgets. It’s essential to check the pH to ensure you have a good blend of sweet & tart apples. It is also essential to have a suitable pH range for the yeast to perform to optimum fermentation ability. The target pH range for cider is 3.2 – 3.8. If you need to increase the acidity, you can use Malic Acid (the acid found naturally in apples) & if you need to decrease the acidity, you can use Precipitated chalk. We recommend that you add only a 1/4 teaspoon at a time if adjusting pH and allow a little time (15 mins), then retest the pH. If you don’t have a Ph meter, you can taste test as the juice comes from the fruit press.
- Adjust the flavour of your cider. You may wish to add some tannins. They produce bitterness that gives ciders some of their flavours. Tannin is a natural preservative. Bittersweet apples contain the most tannins than desert apples with the least. Tannin will help with flavour, body & mouthfeel. Pectolase is also added at the start to improve the taste, extract more flavours, and create a clear cider. Without it, you will produce a hazy cider. (1 tsp per 5 litres will suffice)
- Adjusting the strength (abv/alcohol %). You can add brewing sugar ( Dextrose monohydrate ) at this stage if you want to increase the cider’s strength. We recommend that you don’t overdo it here, as the balance is key to producing an enjoyable product. We would suggest a starting gravity of 1050. You can use an online abv calculator to check what % abv you want to achieve. If you start at 1050 and it finishes fermenting at 1010, that will give you 5.25% abv. The gravity reading is taken using a Hydrometer. It works on the principle of buoyancy. If you need help with using a hydrometer check out our video How to use a Hydrometer
- Add the yeast – We recommend you use good quality yeast. We have had excellent results using AEB AY3, Nottingham Ale, and S-04. A single 11g sachet will suffice for up to 25 litres.
- Monitor the fermentation. If you use a Geterbrewed fermenter, they come fitted with a bubbler airlock, which fits into the lid of the fermentation vessel. Ensuring the vessel is sealed correctly, you half-fill the bubbler airlock with water. During active fermentation, the airlock will have activity from the yeast eating the sugars and generating co2, which will bubble out through the airlock. A key point to a successful fermentation is ensuring a stable fermentation temperature that doesn’t fluctuate. We highly recommend the Ferminator if you don’t have the ability to ferment at a precise temperature. We recommend is your using one of the yeasts mentioned in point 11. You should ferment at between 20-22 degrees. Fermentation will vary depending on certain variables, but you can identify when fermentation is complete as activity in the airlock will cease, and the hydrometer reading will remain stable.
- Bottling. Check out our video When Your Homebrew Is Ready to Bottle & Batch Priming Your Homebrew. It’s critically important that the bottles you are using are sterile. Check out our video How to Sterilise Your beer Bottles & Filling & Capping Bottles. We recommend using 500ml amber glass beer bottles and caps using a table top capper but we do have lots of different capping/bottling options to suit different budgets.
The team at Geterbrewed are very passionate about helping folk brew successfully & consistently. This beginner’s guide to cider making has helpful links to products and videos to help. If you need further assistance, please drop us an email, message via social media or call us on Freephone for an old-fashioned conversation.
This beginners guide to cider making is focused on making cider from apples, we do have options using Cider Making Ingredient Kits & we do have a range of Cider Making Starter Kits
Check out our video on Cider Making