How to Make Beer at Home with Partial Mash Extract Kit
Are you interested in homebrewing but intimidated by the process? Partial mash beer kits are an excellent way for beginners to get started. Partial mash beer kits require a bit more effort than extract-only kits, but the reward is worth it! Making beer at home with partial mash kits allows you to explore different styles and techniques while having fun. This blog post will explain the basics of partial mash beer kits and how to make beer at home with them.
The Benefits of Brewing with a Partial Mash Kit
Partial mash brewing is an ideal stepping stone for those who want more control over their beer than with a kit but are not yet ready to dive into all-grain brewing. Partial mash brewing is necessary when using unmalted grains such as flaked wheat or a malt not available in malt extract form. This allows brewers to use the malt flavour they want without compromising. Additionally, partial mash brewing can be a real advantage when making a beer without a full 4-5 hour brew day.
Mashing grains, or steeping them in hot water, to obtain fermentable sugars is the basis of all beer production. Speciality malts provide the colour and flavour of the beer. The mashing process is simplified by the use of spray dried malt extract, which is the most commonly used form of malt extract for partial mash brewing kits. This allows for a reduced time when mashing and obtaining fermentable sugars and flavour from the speciality malts.
The Equipment You’ll Need
When it comes to homebrewing, we want you to be able to repurpose some standard kitchen equipment to brew without having to buy extra equipment. It is essential to keep all of your equipment clean and sanitized. This means having the necessary cleaning supplies, such as sponges, brushes, and sanitizing solutions. It is also important to have a designated area for cleaning and sanitizing. We suggest having separate buckets for cleaning and sanitizing solutions. You’ll also need a thermometer to check the temperatures and a hydrometer to monitor the gravity of the brew you are making.
For partial mash extract brewing, you’ll need a large pot to act as the mash tun or other container to hold the mashing grains and speciality malts, a brew kettle, a strainer bag for the spent grain, spray dried malt extract, and an ice bath for cooling down the wort. You’ll also need fermentation equipment such as a fermenter, airlock, funnel, and bottling equipment such as caps, bottles, a capper, and a bottling wand.
The Ingredients in a Partial Mash Kit
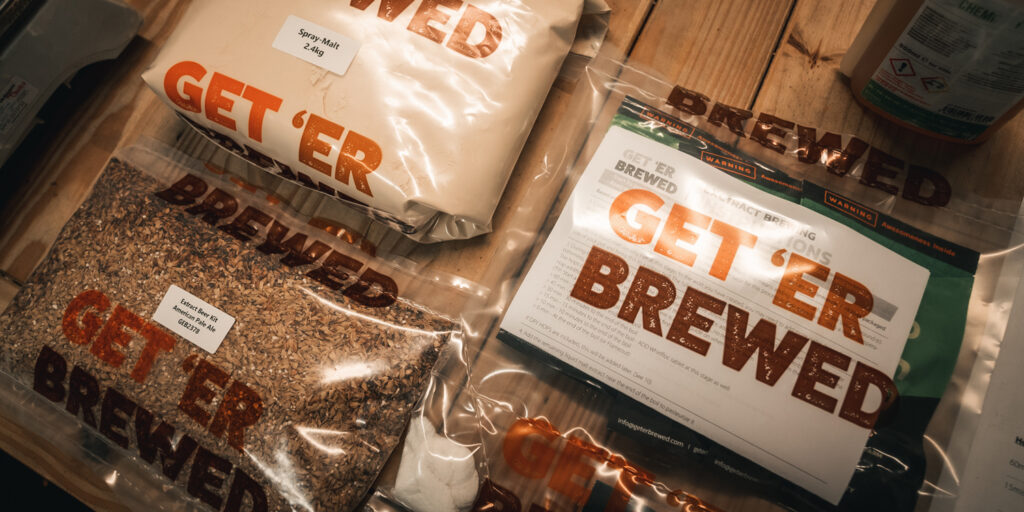
Partial mash brewing kits allow you to experiment with various speciality malts, unmalted adjuncts, and flaked and torrefied products. These kits include mashing grains, malt extract, hops, and yeast. Mashing grains such as barley, wheat, rye, and oats form the basis of most partial mash kits. Speciality malts like crystal, Munich, chocolate, and black provide body and flavour. Spray dried malt extract or liquid malt extract can also be used in partial mash kits, with the best quality coming from Geterbrewed. Other unmalted adjuncts like corn, rice, and honey can also be added for additional flavour or body. Flaked and Torrefied products can also improve head retention and the beer’s body. Partial mash kits offer brewers a lot of flexibility in creating unique recipes and styles of beer.
The Brewing Process
- Step 1: Buy your partial mash kit from Geterbrewed
- Step 2: Read your instructions
- Step 3: Clean equipment
- Step 4: Heat water
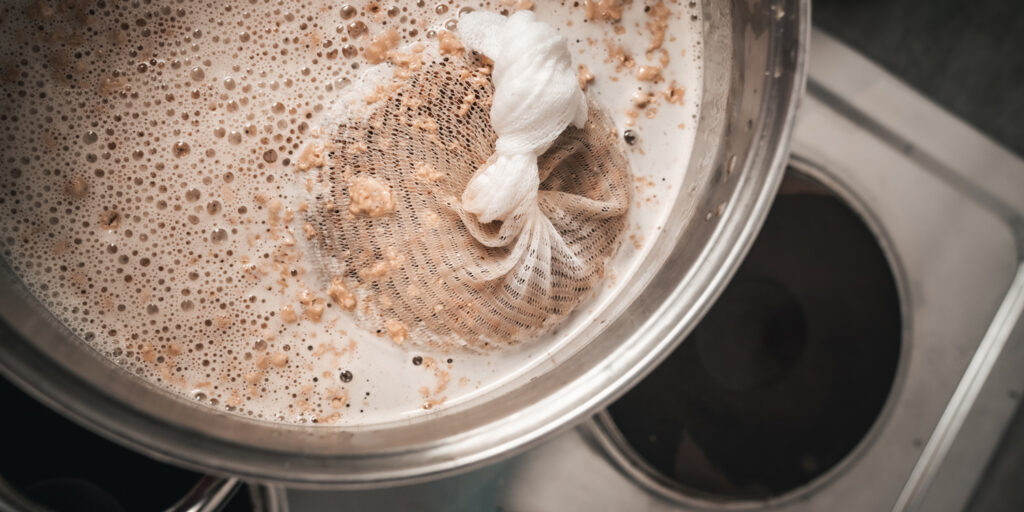
- Step 5: Bag grains
- Step 6: Mash
- Step 7: Remove grains
- Step 8: Add extract
- Step 9: Top up water
- Step 10: Bring to a boil
- Step 11: Add hops
- Step 12: Add Irish moss or protafloc tablet
- Step 13: Add remaining extract
- Step 14: Add wort chiller or cool in a bath of sink water as per step 16
- Step 15: Add hops
- Step 16: Chill
- Step 17: Sanitize equipment
- Step 18: Transfer
- Step 19: Take hydrometer reading
- Step 20: Pitch yeast
- Step 21: Seal fermenter
- Step 22: Shake fermenter
- Step 23: Store fermenter with a stable fermentation temperature
- Step 24: Monitor fermentation with a hydrometer
- Step 25: Boil water
- Step 26: Weigh priming sugar
- Step 27: Add priming sugar
- Step 28: Transfer to bucket
- Step 29: Transfer beer
- Step 30: Attach bottle filler
- Step 31: Fill bottles
- Step 32: Cap bottles
- Step 33: Store bottles
- Step 34: Enjoy
Finishing and Bottling Your Beer
When you have finished the brewing process, it is time to finish and bottle your beer. Before bottling, ensure that the bottles you use are designed to take the pressure of carbonated drinks. These bottles must also be clean and sanitised before use.
One option for bottling your beer is to reuse plastic fizzy drink bottles. While this can save money, it has some drawbacks, such as difficulty finding bottles with good seals and the need to sanitise each bottle before use thoroughly.
Another option is to reuse commercial beer bottles. This allows you to keep the look of a professional beer but requires additional effort, as these bottles often come with labels that need to be removed before use. As with plastic bottles, these bottles also need to be thoroughly sanitised before use.
A third option is to purchase new bottles from the Geterbrewed online homebrew store. This ensures that the bottles are in excellent condition but can be more expensive than reusing bottles. When purchasing new bottles, it is recommended to use brown glass over clear glass as the darker colour helps protect the beer from ultraviolet light. Additionally, you should ensure that there are no chips, scratches or other imperfections in the glass of the bottle that could compromise its seal.
Once your bottles are full and sealed, you will need to wait for the bottle carbonation process to complete. The most accurate way to tell if carbonation is complete when using glass bottles is to look at the bottom of the bottle and check if the sediment has formed from the mashing grains, speciality malts, and spray dried malt extract used in the partial mash kit. Once this sediment has formed, the beer is ready to enjoy!
Checkout the awesome video Mike did showing you just how much fun the process is doing a partial mash extract kit :