Brewiks Microbrewery Equipment
Want to get more beer out of every batch you brew? Want Microbrewery Equipment that delivers results? The answer is Brewiks but you also need to know how to use the Brewiks microbrewery equipment to its full potential.
Case Study of Brewiks Brewery;
Kevin McLaughlin has been our Head Brewery at Hillstown for over a year now. He has been able to consistently maximise output of each batch brewed to ensure we are utilising the maximum potential of the Brewiks Equipment we have.
If your going to make your Brewery a success you need to maximise output, because that means more money from sales
Like the idea of packaging more beer per batch? Then checkout how Kevin uses 20% extra malt in the mash and then dilutes the batch at the whirlpool stage with extra water ensuring full fermenters.
As a result you package more beer for less labour and maximise profits. Above all its critical that you use your equipment to its full capabilities. For example on a typical brewday see below:
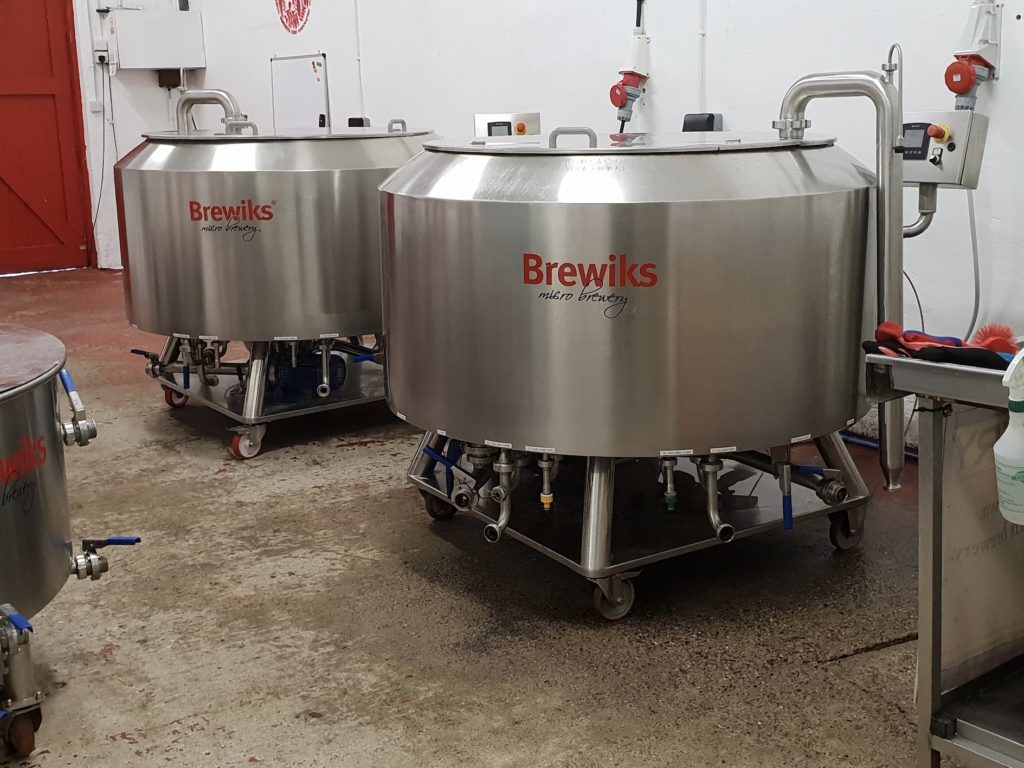
Brewiks Microbrewery Preparation
- Fill kettle with required volume of water.
- Set desired temperature on the control panel.
- Switch on elements (setting: PID and Normal)
- Open mixing inlet and mixing outlet valves and switch on pump at 100% to speed up heating.
I like to preheat the strike water the night before to save time on brewday. I heat to 10-15 degrees C higher than strike temp (depending on ambient temperature) it drops naturally overnight for mash in
Brewiks Mashing In
- Ensure strike water is at desired temperature.
- Mixing inlet and mixing outlet valves should be open.
- Pump is on and at max power (100%)
- Add water treatment if required.
- Slowly add the grain (mixing manually with the mash paddle when required)
- Check mash temperature and record mash in start time.
I always mash for 1 hour with the mixer pump on max, this ensures maximum starch conversion and prevents “hot spots”.
Brewiks Mash transfer
- Firstly, check all valves on lauter tun are closed and false bottom grid is in place and level.
- Turn of heating elements.
- Connect medium hose from outlet valve to whirlpool valve.
- Pump should still be mixing at 100%
- Open whirlpool valve and then outlet valve.
- Rinse down the sides of the kettle periodically during transfer to remove any remaining grain.
- Mix until mixing arm is exposed, then close mixing outlet.
- As the last of the mash is transferring, rinse and remaining grain down the mixing inlet hole.
- Once transfer is complete, close outlet valve and switch off pump.
- Rinse down kettle until the base is covered.
- Now open the mixing outlet valve and switch on the pump at 60% for a few seconds. This will flush out any remaining grain from the mixing arm.
- Close mixing outlet valve and open outlet valve and transfer the remaining mash.
- Close all valves and disconnect and rinse hose.
I like to presparge before beginning transfer, just enough to cover the false bottom, this helps build and even grain bed.
It’s very important to ensure that you continue mixing during the transfer, this will help prevent any blockages.
If the mash is light, it is possible to close the mixing outlet intermittently for a minute or so at a time, this can reduce transfer time slightly.
Brewiks Microbrewery Wort transfer
- Give the mash a mix with the mash paddle and allow it to settle for 5-10 minutes.
- Connect the water supply to the sparge heat exchanger and the sparge pipe to the mash tun to begin sparging.
- Attach the medium hose from the bottom valve on the mash tun to the inlet valve.
- Fit the small hose to the outlet valve and loop it into the kettle.
- Open the bottom valve and the inlet valve, ensuring the mixing inlet is closed first.
- Open outlet valve and throttle the mixing inlet valve open slightly for a second or two to purge any air from the pump.
- Place a coarse hop spider in the base of the kettle and loop the small hose from the outlet into it.
- Now with the pump at its lowest speed (60%) switch on and begin transferring.
- Transfer slowly by switching the pump on briefly for a few minutes and then stopping.
- Once the base of the kettle is covered, switch on the elements with temperature set to boiling.
- Continue transferring until desired volume is achieved.
- Begin mixing by closing outlet and inlet valves and opening mixing inlet and mixing outlet valves, switch on pump at 100%
- Disconnect all hoses and rinse out.
- Shovel out spent grains and remove false bottom from mash tun.
This is a vitally important stage of the brewday and shouldn’t be rushed!!
If the transfer stalls the grain bed can be reset and the process continued.
To shorten the time to boiling temperature I like to mix the wort in between transfers.
Brewiks Microbrewery Equipment Boiling
- Continue heating on boil setting with pump on 100% until the wort temperature reaches mid to high 90s.
- At this point switch off the pump and watch for a rolling boil to start.
- Connect water hose to the condensing flue.
- Record boil start time and add hops as recipe dictates.
- Monitor boil and watch for boil overs.
- If it looks like a boil over is likely, briefly switch off the elements and turn on the pump to mix.
- When boil time is up, switch off elements.
If you are having issues with boil overs, you can lower the boil temperature by pressing all the F buttons (F1,F2,F3,F4) simultaneously and changing the preset boil temperature (usually between 110-120°C). This is particularly useful with high gravity recipes where boil overs are more likely.
To get the maximum volume from each individual brew I back dilute by increasing my grain bill and by 20% and adding 20% extra water at the end of the boil.
Brewiks Microbrewery Equipment Whirlpooling
- After boil connect medium hose from outlet to whirlpool inlet (again ensuring all valves on lauter tun are closed)
- Ensure mixing inlet is open and mixing outlet is closed.
- Open outlet valve and whirlpool valve and begin transferring with pump on at 100%
- If you have a whirlpool hop addition, add it to the lauter tun now.
- Once all wort is transferred, rinse any remaining wort and hop residue out of the kettle.
- Fill base of kettle with water and clean the mixing arm the same way as at the end of the mash transfer.
- Switch off pump, close all valves, disconnect and rinse hose.
- Remove condenser and lid, and clean them and the kettle. Replace after.
I try to allow the wort to settle for as long as possible before moving onto the next step (20+ mins)
If you are doing a hop stand addition, simply wait until wort cools to the appropriate temp and add hops directly to the lauter tun.
Brewiks Cooling and transfer to fermentation tanks
- Connect the short hose from the outlet valve to the hot wort inlet.
- Attach the medium hose from the inlet valve to a bucket of clean water.
- Fit the long hose from the cold wort outlet to a drain.
- Open inlet and outlet valves, ensuring mixing inlet and mixing outlet valves are closed.
- Turn on the pump at 100% and flush out pipework with the water in the bucket (topping the bucket up as it empties)
- Add non rinse sanitiser to the bucket and loop the end of the long hose from the cold wort outlet back into the bucket.
- Cycle the sanitising mixture for a few minutes and then switch off pump.
- Connect the medium hose from the inlet valve to the side bottom valve.
- Turn on the pump at 60% and run until you see wort coming from the end of the long hose.
- Spray sanitiser on the bottom valve of the fermenter and connect long hose from cold wort outlet to it.
- Connect a 3/8″ pipe from the vent pipe of the fermenter into a bucket of water, this will act as an airlock.
- Connect the mains water supply into the cold water inlet connection. Using a short length of hose, loop back from the hot water outlet connection back into the kettle.
- Now take a wort sample for testing from the lauter tun side valve.
- Begin transfer, monitoring cold wort temperature and adjusting pump speed to get the desired temperature (higher pump speed equates to a higher transfer temperature and reversely a lower speed will lower the temperature)
- Continue transferring, regularly checking the transfer temp and the volume of wort left in the lauter tun.
- Monitor the sight glass until you see trub flowing then close valves
- Disconnect all pipes and clean down.
- Check temperature of wort in the fermentation tank is correct and pitch yeast.
I like to transfer a degree higher than the required fermentation temperature, remember it’s always easier to lower the temperature a degree or two than it is to raise it.
The brewiks comes as standard with an analogue temperature gauge on the cold wort outlet, personally I have replaced this with a digital temperature prob and I get a more precise reading and can react quicker to variations in transfer temperature.
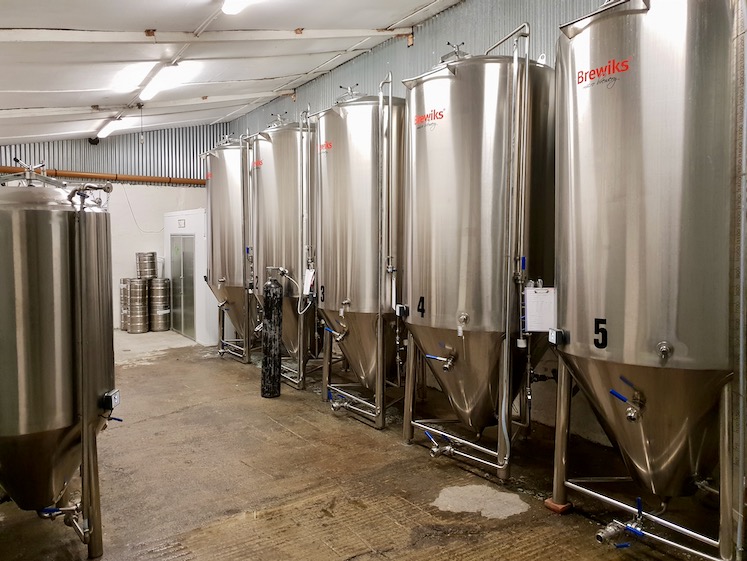
Pressurised Brewiks Fermentation Tanks
- Set controller to “Col” and set fermentation temperature
- Monitor the fermentation process over the next few days and take regular samples of the gravity.
- When gravity reaches 6 points from the target final gravity, close the airlock, natural carbonation then takes place and as a result produces a softer mouthfeel
- Keep a close eye as the pressure increases over the next 12 hours.
- Monitor fermentation until complete then lower the temperature to half and maintain for 24hrs.
- Now crash cool by setting the temp to -1°C.
- After 48hrs of crash cooling you can drop the yeast out of the bottom valve.
- Continue conditioning, monitoring taste and test carbonation throughout. We use a taprite carbonation tester
If your interested in learning more we have brewdays once per month at our production facility and the Brewiks Microbrewery Equipment can be found here: https://www.geterbrewed.com/brewiks-equipment/